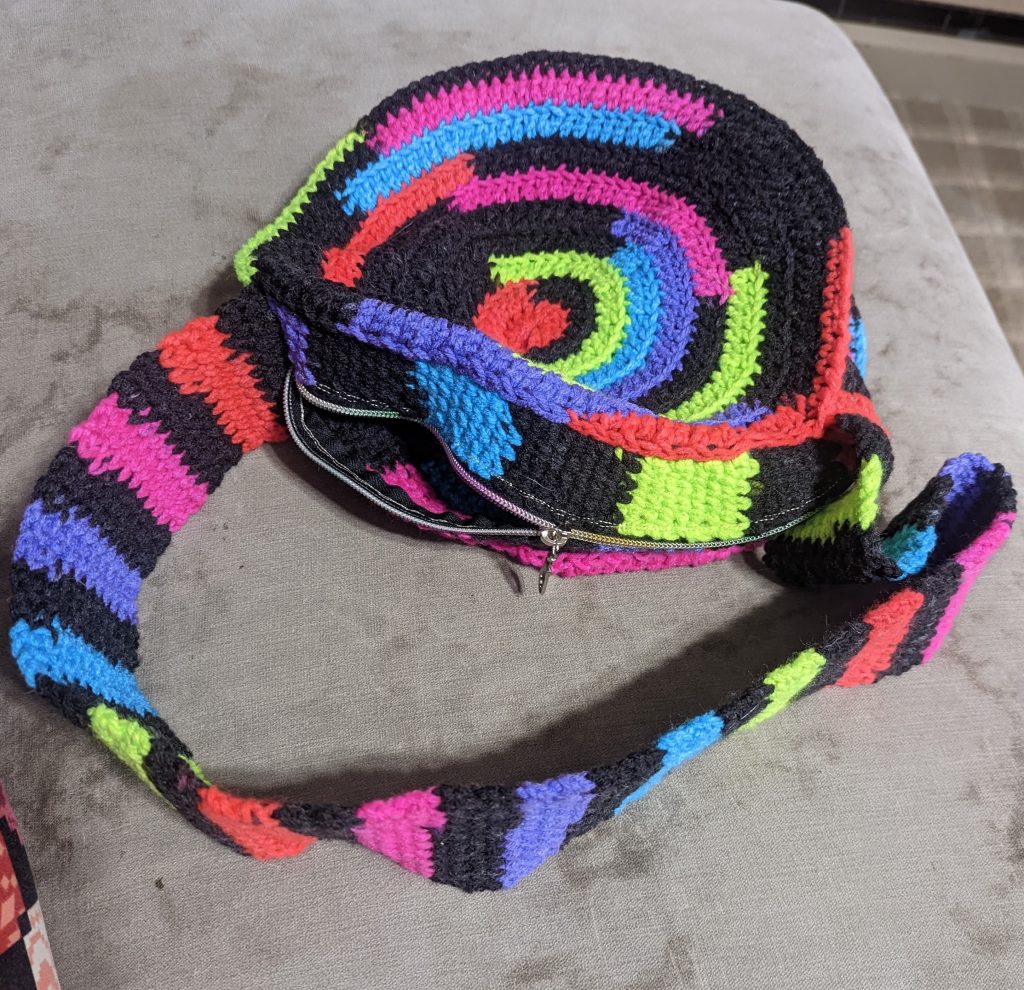
My daughter has just reached the age where she wants to carry her own purse. Over the past couple of months, she has used her allowance money to buy two different purses. One she liked but it was too small to hold everything–she learned the lesson of practicality and function over fashion early! The other one fit everything all right, but she declared it “just wasn’t her.” So I thought (as she put it) “Hold my hook!” (my crochet hook, that is) and I came up with a purse that is 100% her! It’s funky and fun and colorful and unique. And it fits everything, too.
Pattern: Spiral Purse
Written by Reba at Crafty Reason
http://craftyreason.com
Terms/Abbreviations:
MC: Magic circle
DC: Double crochet
BLO: Back loop only
STS: Stitches
HDC: Half-double crochet
SC: Single crochet
CH: Chain
WC: Waistcoat stitch, aka knit stitch
WS: Wrong side
RS: Right side
BO: Bind off
You will need:
Red Heart Super Saver Neon Stripes (less than 1 skein)
Sizes 4 and 5 crochet hooks
Zipper (I used a rainbow zipper to match the bright colors in my yarn)
Embroidery needle
Sewing machine or needle and thread
Pattern Notes:
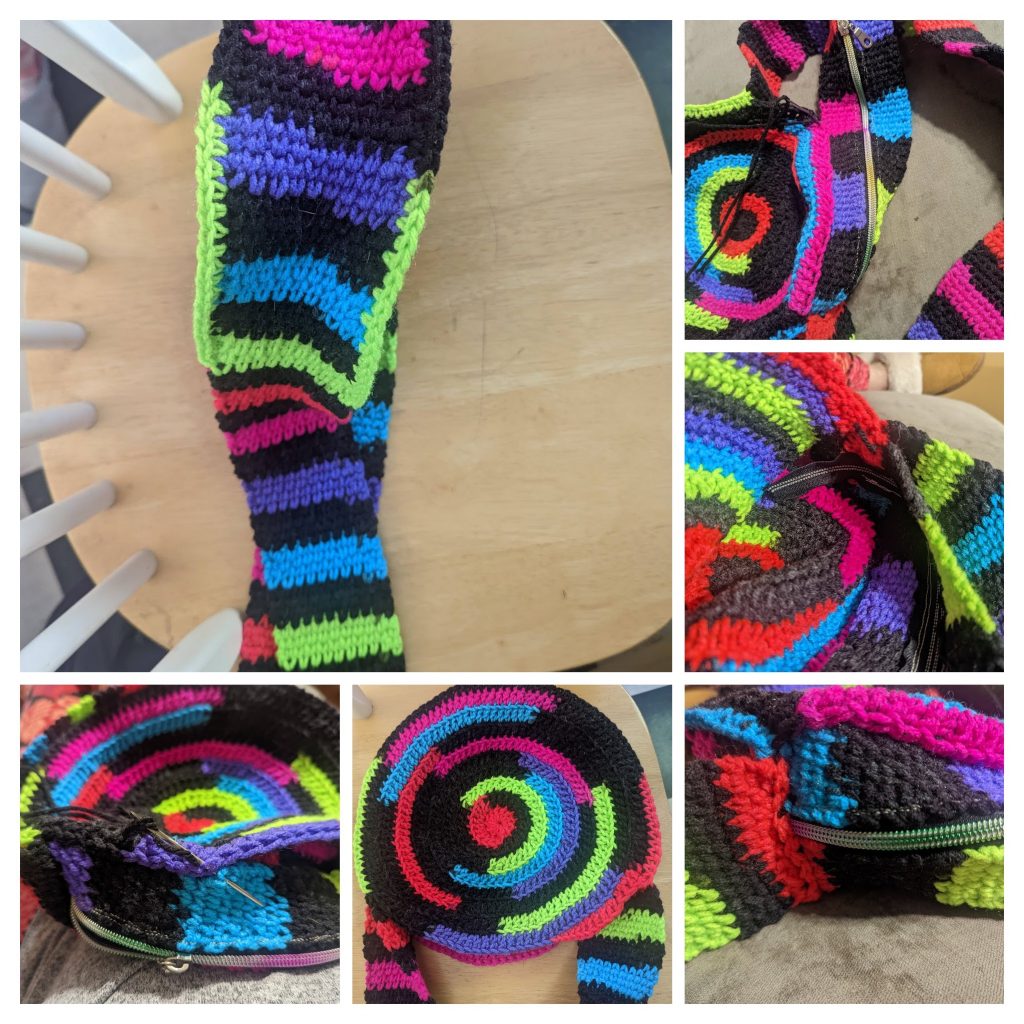
You will be crocheting a round purse with a spiral pattern in a continuous spiral. It is simply constructed, with two round sides, one long loop that comprises both the base and the strap, and a zipper closure with two small flat pieces to attach the zipper to the purse. The zipper closure is optional and may be modified to meet the preference of the user. You may add a flap closure, or a chain loop around a button, or you may even leave the top completely open, although if you do this, I suggest crocheting the strap a little more closely “in” over the top of the circles, so that the purse will hold its shape better. With the zipper closure, the tops could be as wide as the strap allows for the easiest access.
The Waistcoat Stitch (WC) aka Knit Stitch will create a sturdy base and strong strap for your purse. Heart Hook Home has a great step-by-step guide including a video tutorial (https://hearthookhome.com/waistcoat-crochet-stitch/). If you don’t feel confident crocheting in the waistcoat stitch, you can do single crochets instead.
Crochet Instructions:
Purse sides–Make 2.
With size H (5mm) crochet hook, in a variegated color worsted weight yarn:
- 12 dc in mc (12)
- (Inc dc) around (24)
- In BLO until otherwise stated, (Inc, dc) around (36)
- (Inc, dc x 2) around (48)
- (Inc, dc x 3) around (60)
- (Inc, dc x 4) around (72)
- (Inc, dc x 5) around (84)
- (Inc, dc x 6) around (96)
- (Inc, dc x 7) around (108)
- Continue in this pattern, increasing stitch count by 12 (increasing the single DC count by one) each round until the diameter measures 10”.
- For final round, final three sts: hdc x 2, sc, sl st to first st in previous row. BO and weave in end. Note: after cutting yarn, you can pull it all the way up through the stitch, then weave it around the next stitch and back through the original stitch, making the end a little less noticeable. Then weave in end as desired.

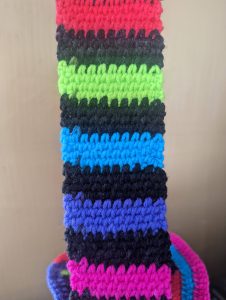
Purse bottom and strap loop–Make 1.
Use same hook and yarn:
- Ch11. (11)
- Starting in 2nd ch from hook, sc across. (10)
- Ch1, turn. Sc in same st, wc x 8, sc in last st, ch1, turn. (10)
- Rep row 3 until purse bottom and strap measures your desired length. (Mine was 47 inches.)
- Fold strap in half with WS facing out. SC across, attaching two sides together. (10)
- Turn project RS facing out, sideways, and place one purse side against the strap, lined up along the edge. Work SC into the strap lined up with the sc sts along the purse side. BO and weave in ends. Repeat with other purse side.
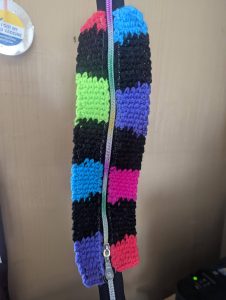
Purse zipper closure attachments–Make 2.
With size 7 (4.5mm) hook:
- Ch6. (6)
- Starting in 2nd ch from hook, sc across. (5)
- Ch1, turn. Sc in same st, wc x 3, sc in last st, ch1, turn. (5)
- Rep row 3 for 51 rows, until strap is 52 rows long. BO and weave in ends.
Finishing / Final Assembly
Depending on the type of zipper you get, you may have to trim the zipper to the length you want and attach the pull. Cut it a little longer than you expect to use. Using a sewing machine or by hand, attach the zipper to the closure attachment strips with the zipper in the center. Then using embroidery needle and project yarn, sew the zipper to the top/opening of the purse, starting at the front strap end, moving across the strap, across one circular top side of the purse, across the other strap end over the zipper, and across the other circular top side of the purse. Tuck the extra flaps of closed zipper inside the purse just underneath the strap on either side.
Please feel free to sell the purses you’ve made, but please credit Crafty Reason and link back to the pattern here if you do so. Please contact us at craftyreason@gmail.com for permission if you wish to reproduce this pattern. Also, send us a message if you notice anything wrong with the pattern. Happy crocheting!
~Crafty Reba
Learn more about Crafty Reason at http://craftyreason.com/about-us/
This pattern is also available on Ravelry. You can purchase a PDF of the pattern there if you would like your own formatted copy.
